Planning Nipple Drinker Installation for Different Chicken House Layouts




Installation Planning Starts With the House, Not the Drinkers
A nipple drinking system can look straightforward on a layout drawing: water enters at one end, runs through suspended lines, and reaches birds through evenly spaced nipples. In practice, the installation becomes far more complicated when the house has a central aisle, irregular pen divisions, multiple feeding circuits, uneven floors, a low ceiling, or a planned expansion phase. For a project manager, the question is not simply whether a nipple system is suitable. It is whether the water system can be installed, tested, operated, and maintained without creating pressure imbalance, inaccessible valves, wet litter zones, or conflicts with other equipment.
House geometry affects nearly every installation decision: the number and length of drinker lines, regulator locations, incoming water capacity, suspension arrangement, flushing access, and the position of control equipment. A design that works in a narrow naturally ventilated house may be awkward in a wide tunnel-ventilated house, while a retrofit project may require compromises that would be unnecessary in a new build.
The practical objective is to provide every bird access to water while keeping the system controllable. That requires planners to assess the building as a complete operating environment rather than treating nipple lines as a stand-alone purchase item.
Map the Water Route Before Finalizing Line Placement
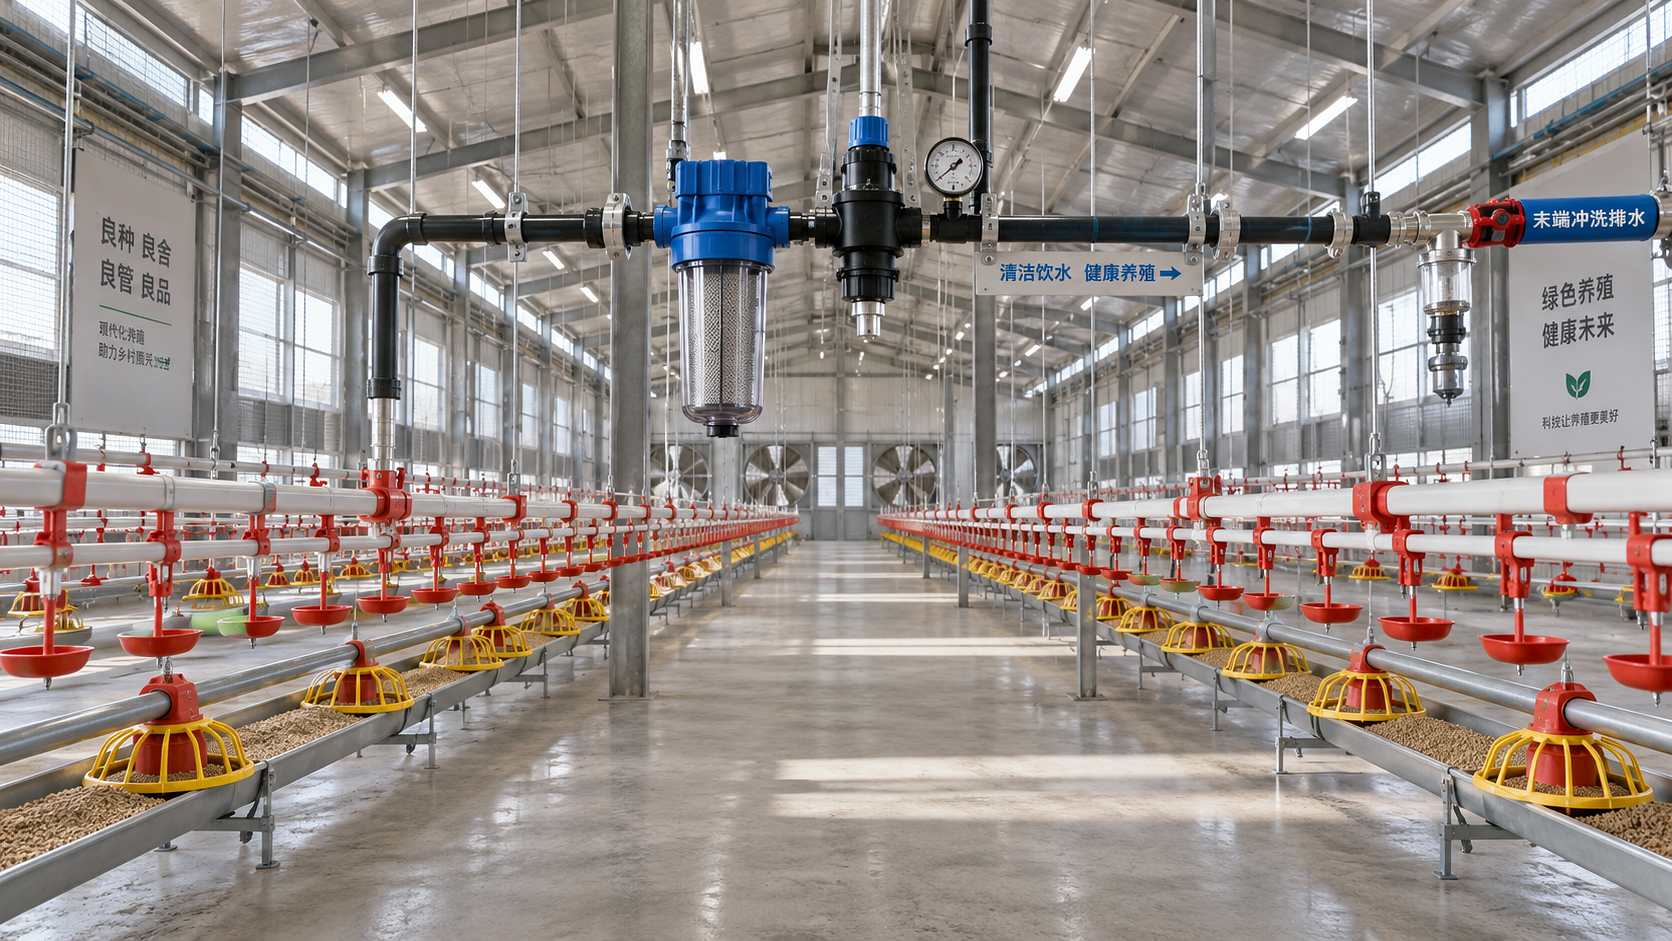
A useful planning exercise is to trace the full route of water from the source to the last nipple. This should include the incoming supply, filtration, medication or dosing equipment where used, pressure regulation, line distribution, flushing points, and drainage arrangements. Each component needs physical space, service access, and a defined position in the operating sequence.
In a new house, equipment rooms and entry points can be designed around the water route. In an existing house, water may have to enter from a sidewall, service corridor, or one end of the building. The location matters because long branches and multiple changes in elevation can make pressure adjustment less predictable. Pressure at a regulator does not automatically confirm that water delivery is consistent at the far end of every line.
Before installation, the project team should document:
- house length, clear width, ceiling height, and any changes in floor level;
- the usable area after accounting for feed lines, heating equipment, columns, partitions, and access passages;
- the intended flock type, stocking plan, and management method;
- the water source condition, including the need for filtration, treatment, or storage;
- power availability for pumps, dosing equipment, alarms, or controllers where applicable;
- points where lines can be drained, flushed, isolated, and visually inspected.
This survey should be completed before the final bill of materials is approved. Moving a regulator, adding supports, or altering pipe routing after feed and ventilation systems are installed can increase labor time and introduce unnecessary joints or bends.
House Layout Changes the Line Arrangement
Long, narrow poultry houses
In a long narrow house, drinker lines generally run parallel to the long axis of the building. This arrangement supports orderly bird distribution and usually aligns with longitudinal feed lines. The principal concern is line length. Longer runs require careful attention to suspension level, pressure setting, and end-of-line flushing. A small height difference between the beginning and end of a line can affect how water behaves along the run, particularly when pressure is set close to the lower end of the acceptable operating range.
Access should not be overlooked. If line ends terminate near a wall, there must still be room for an operator to flush the line, inspect end assemblies, and collect water samples if required by farm procedures. A line end hidden behind fixed equipment may be functional on commissioning day but difficult to maintain during production.
Wide tunnel-ventilated houses
Wide houses often use several parallel drinker lines. Here, spacing between lines must be coordinated with feeder pan locations, air inlets, cooling pads, fans, and service lanes. The aim is to avoid crowding birds into a narrow band between feed and water equipment or creating sections where a drinker line is blocked by a structural element.
For multi-line layouts, planners should determine whether lines will share a common supply manifold and whether each line or group of lines can be isolated. Isolation is useful during repairs or troubleshooting, but excessive valves can complicate the system and create more points for leakage. The best arrangement is usually one that allows practical control without requiring the operator to memorize a complicated valve sequence.
Houses divided into pens or sections
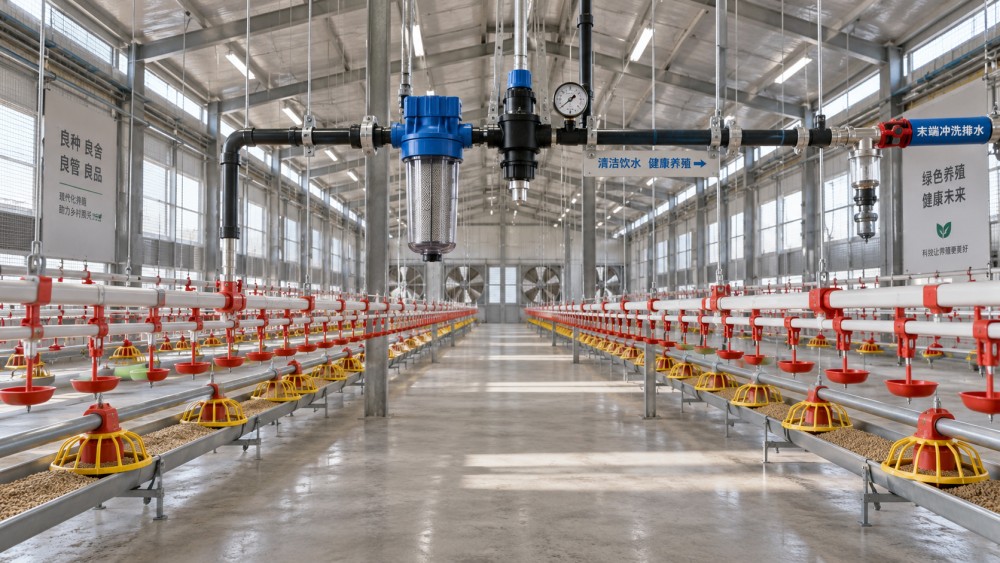
Brooder partitions, breeder pens, quarantine sections, and management zones can interrupt a simple straight-line design. In these layouts, the project team needs to decide whether each section needs an independent drinking circuit or whether continuous lines can pass through partitions. Independent circuits can make management and repair easier, but they add regulators, fittings, and commissioning work. Continuous lines reduce hardware but may make it harder to isolate a problem without affecting several sections.
Partition openings should be checked against line height adjustment. A drinker line normally needs to be raised as birds grow, so it must not catch on a fixed partition, cable tray, or low beam. Where lines pass through a partition, the penetration should allow movement without abrading the pipe or placing a lateral load on fittings.
Multi-level and sloped-floor buildings
Any change in elevation should be treated as a hydraulic design issue rather than a minor construction detail. Water pressure is influenced by vertical height, and a system installed across a noticeable slope may need sectional regulation or a routing change. Relying on one regulator for lines with materially different elevations can produce uneven delivery conditions.
Suspension systems also deserve close review in sloped or irregular buildings. The line should remain level according to the equipment supplier’s installation requirements, even if the building floor is not. Using the floor as the only visual reference can lead installers to set the water line incorrectly.
Coordinate Nipple Lines With Bird Access and Equipment Movement
The position of a nipple line affects bird behavior, litter condition, labor access, and equipment clearance. It must be high enough to be adjusted through the production cycle, but low enough at placement for the intended birds to reach the nipples. The proper initial and final heights depend on bird type, age, nipple design, and the management program, so project specifications should state the required adjustment range rather than assigning one fixed height to every house.
Horizontal location matters as well. A line too close to a wall or feeder can restrict access. A line placed directly below a regularly used winch, heating line, or mechanical obstruction may be difficult to raise. In houses where equipment is lifted between flocks, the routing of suspension cables, electrical conduits, and water pipes needs to be reviewed together. A conflict found after installation can force an improvised support arrangement that makes later adjustment inconsistent.
Drip cups, where included, need clearance from feeder components and must remain correctly aligned beneath the nipples. They should not be assumed to compensate for poor pressure control or leaking connections. Persistent water beneath drinkers should prompt inspection of line pressure, nipple condition, connection integrity, and bird-induced spillage rather than simply adding more litter.
Specify the Hydraulic Components as a System
Project documentation should describe more than the number of nipples and meters of pipe. It should identify the water treatment and control components required upstream of the drinker lines. Depending on source water and farm practices, this may include filters, pressure regulators, gauges, medicator connections, non-return devices, flushing assemblies, and storage or pump equipment.
A pressure gauge is useful only when it is installed where personnel can read it and when its range is appropriate for the line’s normal operating pressure. Similarly, a filter that cannot be isolated and cleaned conveniently may receive less maintenance than intended. Serviceability is part of design quality.
Where water treatment chemicals or veterinary products are used, compatibility should be checked with the suppliers of the treatment product, dosing equipment, pipe, seals, and nipple assemblies. Material compatibility, mixing sequence, contact time, and flushing procedures can vary. A project specification should avoid assuming that every elastomer, fitting, or transparent component will behave the same way under repeated chemical exposure.
For teams seeking a step-by-step installation reference, this guide on how to install nipple drinker for chicken can be used alongside the equipment drawings and the supplier’s operating instructions. The practical sequence remains important: mounting a line before verifying support points, water direction, flush access, and regulator position often leads to rework.
Installation Tolerances That Affect Daily Performance
Small installation errors can create recurring operational problems. Lines should be supported at the intervals specified for the pipe and suspension arrangement. Unsupported spans may sag when filled with water, changing line level and placing stress on connectors. Over-tightened clamps can damage pipe, while loose suspension points can allow lines to shift when birds contact them or when equipment is raised.
Installers should also maintain a clear distinction between permanent pipework and components intended to move with the drinker line. A rigid connection to a line that must be raised and lowered can strain joints unless a suitable flexible connection or designed movement point is included. This is especially relevant at regulators, header connections, and transitions through structural walls.
Commissioning Should Test More Than Whether Water Comes Out
A completed installation should be inspected before birds enter the house. The commissioning process should include a visual review of supports, fittings, regulators, gauges, filters, and line ends. Lines should be flushed according to the equipment and farm water-management procedure, with attention to whether flushing water can be handled without flooding the service area or wetting bedding zones.
Pressure should be checked after the system is filled and stabilized, and observations should include the far ends of lines rather than only the regulator area. Inspectors should look for leaks, trapped air, sagging sections, poorly aligned cups, inaccessible shutoffs, and unintended contact between the water lines and feed or heating equipment.
It is also sensible to document final routing, valve locations, line identification, and the normal positions of moving components. This record supports handover, maintenance training, and future expansion. A simple marked drawing can prevent a later contractor from cutting into a concealed pipe or attaching unrelated equipment to a water-line support.
Procurement and Handover Questions for Project Managers
Procurement packages should ask suppliers to define what is included in the system boundary. “Nipple drinker line” can mean very different things depending on whether regulators, filters, hanging hardware, end kits, gauges, flexible connectors, dosing interfaces, and spare seals are included. Ambiguity at this stage often becomes a site issue when installation is already underway.
Ask for assembly drawings, parts lists, installation instructions, operating pressure guidance, maintenance requirements, and recommended spare parts before shipment. The receiving inspection should verify that pipe lengths, connection types, support hardware, and quantities match the approved layout. Where components arrive in multiple shipments, label control is important; a missing end kit or regulator can delay commissioning even when most of the system is on site.
The most reliable installations are planned around access, line level, controlled pressure, flushing capability, and coordination with the house structure. A nipple system performs as part of a broader water-management arrangement. When that arrangement is designed to suit the actual house layout, the result is easier to commission, easier to inspect, and less likely to require disruptive changes after the flock arrives.
Related News
How Large-Scale Farm Telematics Cuts Downtime Across Mixed Fleets
Large-scale farm equipment telematics cuts mixed-fleet downtime with real-time alerts, smarter maintenance, and stronger operational control. Learn how to protect critical farm workflows.
How to Size Low-Pressure Water-Saving Irrigation Systems for Uneven Fields
Low pressure water-saving irrigation systems for uneven fields: learn zoning, pressure mapping, pipe sizing, and pump selection to improve uniformity and reduce water waste.
Farm Machinery Sourcing: How to Vet Suppliers, Specs, and Lifecycle Costs
Farm machinery information for sourcing: learn to vet suppliers, compare specifications, control lifecycle costs, and secure reliable uptime for smarter equipment purchases.
Which costs matter most when calculating precision agriculture ROI?
Calculating ROI on precision agriculture equipment? Discover the costs that shape returns, from installation and subscriptions to downtime, labor, and data integration.
How to calculate ROI on precision agriculture equipment before buying
Calculating ROI on precision agriculture equipment: learn to assess total ownership costs, savings, payback, NPV, risks, and farm-scale value before you buy.

Tractor Specification Sheets: Matching PTO, Hydraulics, and Weight to Farm Tasks
Specification-oriented articles for tractors: match PTO, hydraulics, lift capacity, ballast, and weight to real farm tasks for safer, more efficient equipment choices.
How to Evaluate Dynamic Feedback Algorithm Suppliers for Precision Farming Systems
Dynamic feedback algorithms supplier evaluation guide for precision farming—compare validation, integration, safety, and pilots to choose with confidence.
How to Specify Combine Harvester Systems for High-Moisture Grain and Variable Field Conditions
Combine harvester systems for high-moisture grain: learn how to specify threshing, cleaning, headers, traction, and automation for reliable harvests in variable fields.
How to Compare Agricultural Equipment Platforms for Fleet Management and ROI
Agricultural equipment platform comparison: evaluate fleet data, maintenance, precision workflows, and ROI to choose a system that delivers measurable results.
Related News
- 00
0000-00
How Large-Scale Farm Telematics Cuts Downtime Across Mixed Fleets - 00
0000-00
Farm Machinery Sourcing: How to Vet Suppliers, Specs, and Lifecycle Costs - 00
0000-00
Which costs matter most when calculating precision agriculture ROI? - 00
0000-00
How to calculate ROI on precision agriculture equipment before buying - 00
0000-00
Planning Nipple Drinker Installation for Different Chicken House Layouts
Popular Tags
Ms. Elena Rodriguez
Weekly Insights
Stay ahead with our curated technology reports delivered every Monday.